Even I, a decent illustrator sometimes don’t seem to have the mood to draw a complete figure from scratch, you got the hazy image from your imagination but just couldn’t seem to get it to be drawn by your hands, you get discouraged by the difficult perspective of the image, like when you want it to look detailed in a 3d dimension. When this happens to me I turn to google to search for an ideal image. In this tutorial I show you how to trace from an image and make a new rendering of that image to make it quite different to the traced image and more ideal to your preference.
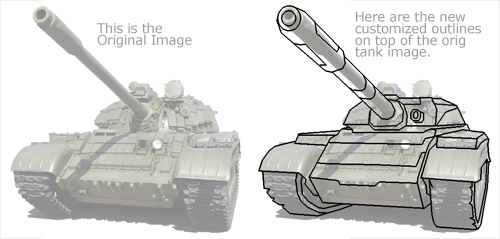
Let’s take this tank for example.
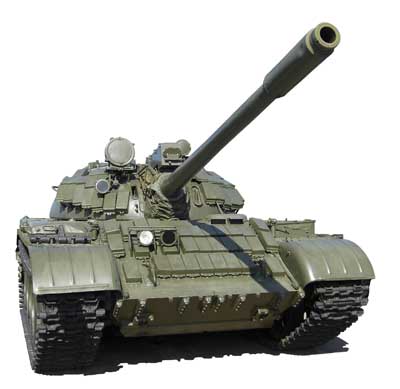 This image will be the base image. What we’re going to do here is that we will create a new ideal image art from it. Basically what we need from this original image is its perspective, shape, lighting and shades. We’re not going to edit or modify this original image instead, we will going to create a new image from scratch by hand but we will take the attributes of the original image by tracing it. Now open up your image editing program, preferably one that supports layers. In my case I am going to use my favorite software GraphicsGale. I am going to flip this image horizontally just to make the new image we will draw appear less than 100% similar to original.
The primary tool were going to use here is the “line tool”, it is where you can form a line from one position to another. I use this because since we are trying to make a tank image, a tank image is more made up with straight lines, so a line tool is more appropriate… plus it is easy on the hands.
Now open the original image on the paint program, if your program supports layer transparency, then go on and adjust the opacity of the layer lower enough. If your software don’t support transparency you could just increase the brightness.
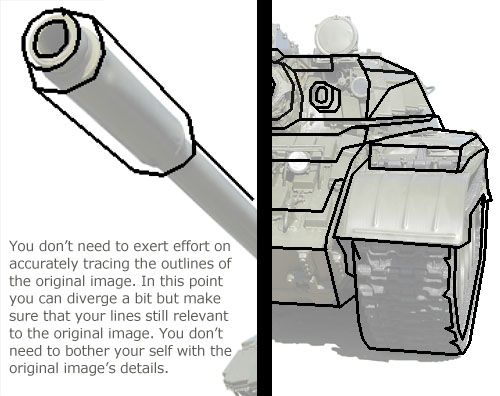
Next, add a new layer on top of the original image/layer. Use the line tool and start anywhere you like. At this moment you will begin tracing the lines of the original image’ shape.
Start by outlining the shape of the tank, you don’t need to perfectly outline everything, you only need to put lines on the most distinguishing features of the tank. After that, you can do anything you want to add to it.
One important thing is that you must make sure that all lines intersect, you must fill any open gaps between lines, because we will going to use the “flood-fill” tool later… and doing this properly may become convenient later when filling the image with colors.
You are free to do anything here like for example you want to add a gun implement on the tank, attach an army guy on top, and what not.
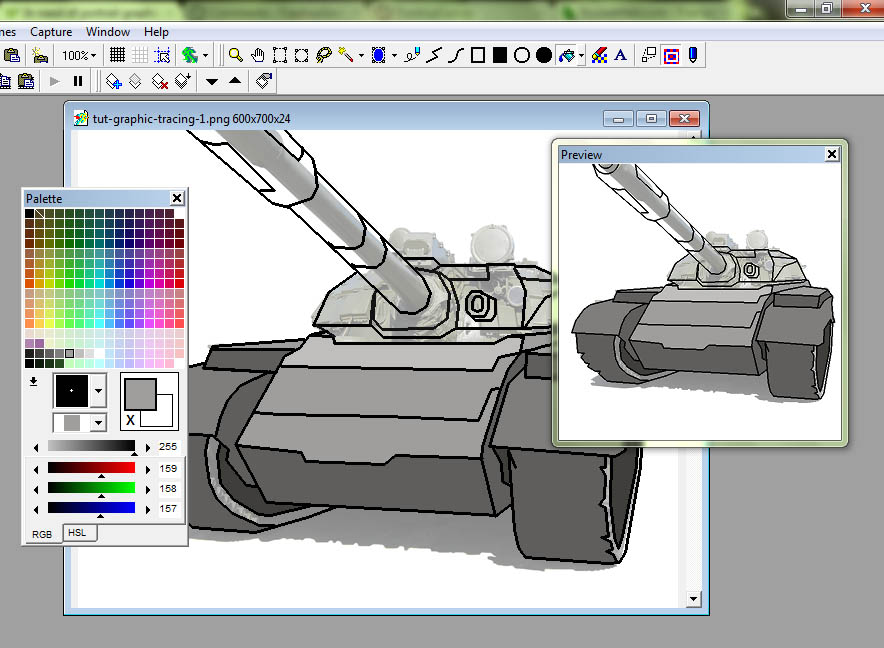
Next we are now going to fill it with color, at this stage we will still take into account the original image especially its shadings and lightings. Observe the areas where there is more shadings or lightings, then base on that you can decide which color to use. In this tutorial I opted to use a more grayscale palette.
Since the lines have no open gaps, you can easily fill the holes with solid color… so again, make sure that the lines have no open gaps in between.
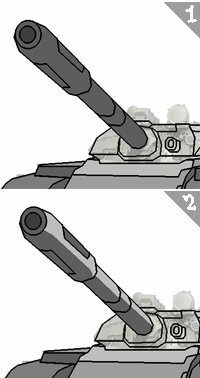 As you can see in the image above, using the flood fill tool I have picked the colors I filled in area holes based on lights and shades of the original image. If you are a more advanced illustrator you may even have the ability to change the light source position, thus making the light and shade appear on different areas.
Now let’s get a more detailed look. Here is how I made the coloring of the new tank model step by step… the one showed is on the turret part of tank:
1. I filled all the holes area first with the second possible darkest shade color. This is so we could just add thereafter the more lighter colors.
2. I drew a line from top across to bottom for every segment of the tank’s turret, basically what I’m doing here is to create a filling hole so I can apply a new solid color by fill tool. Next, I added now the second most light color.
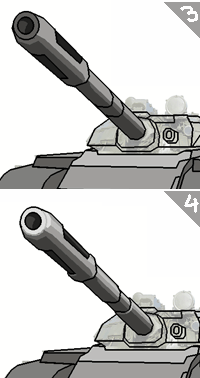 3. Next, I drew a line to form the darkest shade part of the turret and then applied the color. In the tip of the turret, you can notice that the hole is also colored to look like it has some depth. Now, the turret part is getting some detailed appearance.
4. Now I have again drew some lines within the 2nd most light color area. This is where I will apply the brightest color, you can call this color the “specular”. Specular refers to the property of a material that reflects light. So in our case our turret is a metal material thus, it should have some specular, but make sure it is applied on the right places in your drawing.
At this stage I also tweaked the turret tip to appear lighter, I also put some interesting impressions on turret’s segments. I also added shading on the black parts of the end segment of the turret.
Now, back to the entire tank… apply the same coloring technique to it.
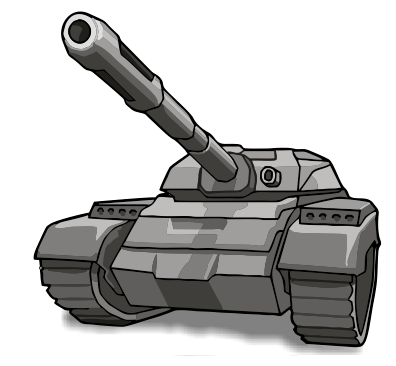
Now here is our our new tank image.
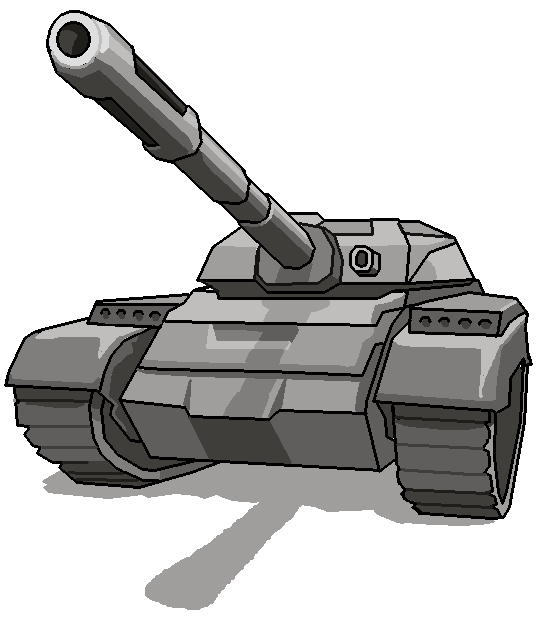 Now to make the tank’s lines look smoother, I opened up my CorelDraw program and used its PowerTrace feature… this is where a raster image (formats like jpeg, gif, png, and bitmaps) can be converted to vector… it is indeed a great feature. I applied it to the tank and here is the final image.
So it looks like it can be used for some game’s cover art… or even use it as an icon button for an RTS game. Oh well, have fun.

1 Response
Digg…
[…]While checking out DIGG today I noticed this[…]…